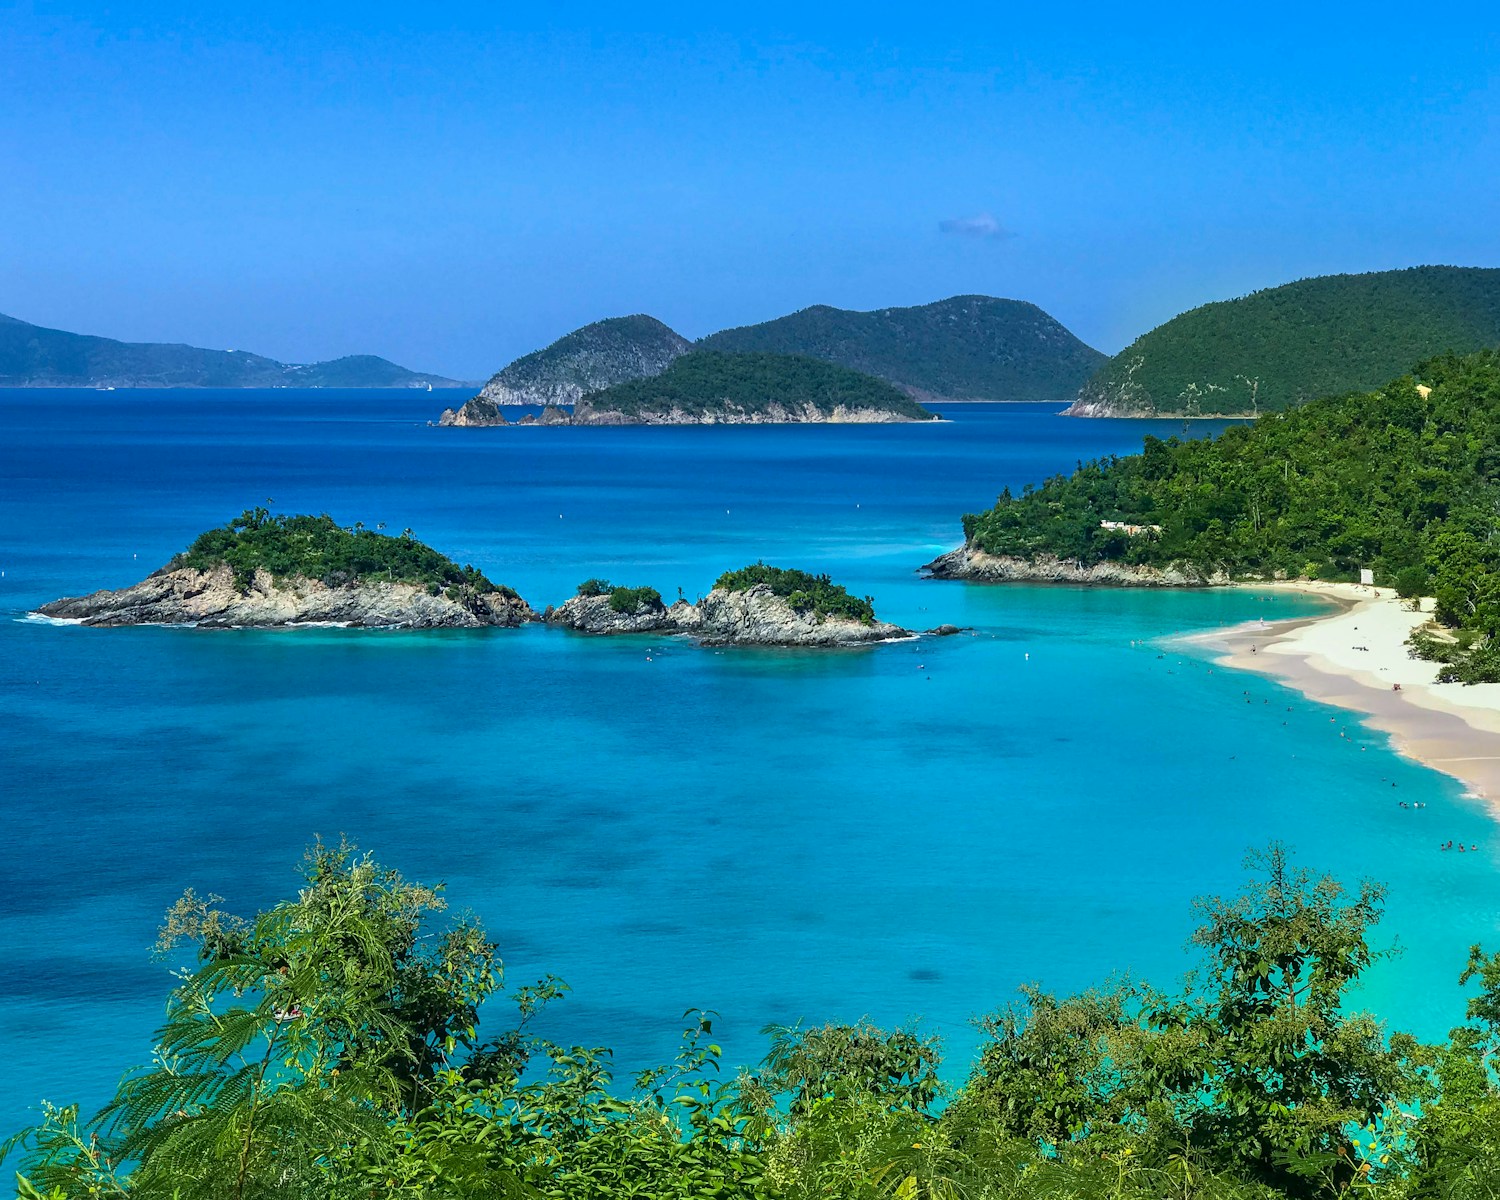
Adding Images to WordPress
Adding Images to WordPress that will Elevate Your Site
Part 2 of a Blog Post Series on Using images for your Website
In the first post, we discussed the important job of finding, selecting, and preparing images that will improve your content. Finding and preparing the image are necessary steps, but now it is time to learn the important steps and considerations for adding these images to your site.
Images Matter!
Photo by Matt Thomason on Unsplash
Size and Composition
Standard WordPress Image Sizes
WordPress will save the image in four different standard size formats when adding an image to a WordPress website. It is possible to change the default sizes by going to Settings -> Media in the admin area of WordPress. The standard sizes include:
- Thumbnail – 150px square
- Medium size – 300px wide
- Large size – 1024 px wide
- Full size: The full original image size that you upload.
Because WordPress saves a version of the image in the full size uploaded to the site, it is important to compress all of your photos before uploading them to WordPress. If a full resolution image is added to the site, WordPress will store large images and many sites will have images that are 4,000 px and higher. Having such a large image size can slow down page load speeds to a crawl and take up space on your web server.
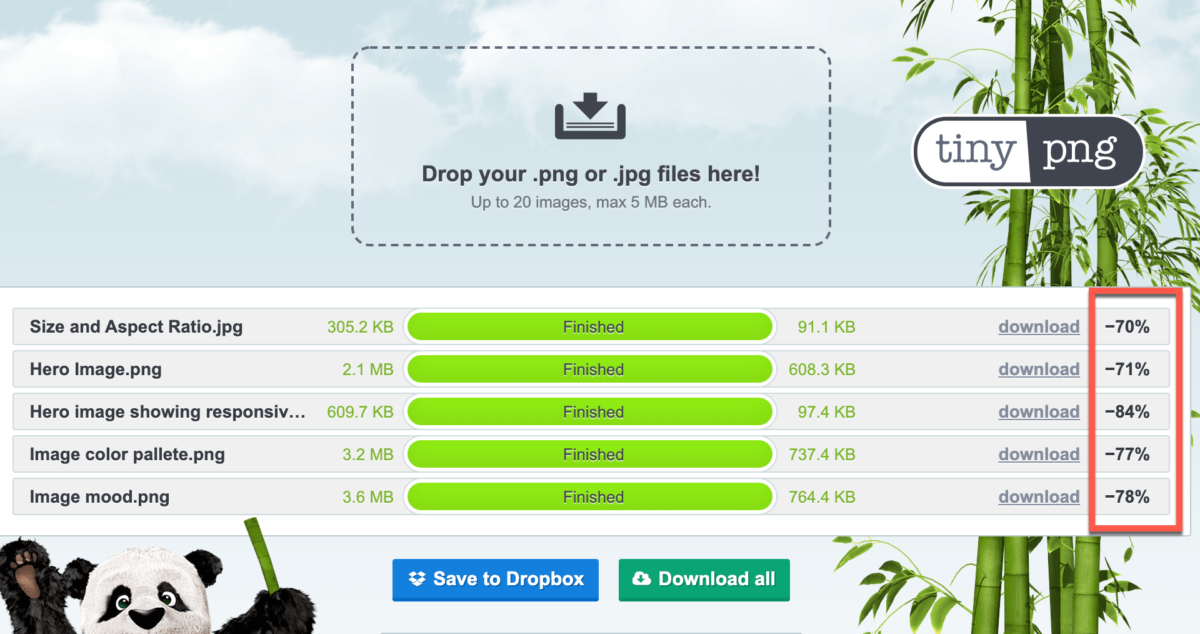
In this example, the website tinypng.com compressed the images and reduced the file size by as much as 84%.
Options and Resources for Compressing images
Our Favorite – As seen in the image above, this free service will allow you to upload images to their site, compress them, then download the photos. Depending on the image, photos can be compressed, saving anywhere from 50% to 80%.
Compressor.io is another website tool that can be used to compress images.
Cloudinary is a complete media management system with free and paid plans. The service allows you to upload, edit, optimize, and even edit meta-data for SEO purposed from their dashboard. It also serves as a CDN (content delivery network) to speed up your site.
Imagify also compresses images and it runs in the background and will compress images as they are added to the site. There is both a free plan that has limits and a paid plan with unlimited compression.
Smush-it is one of the most popular and widely-used plugins in the WordPress space for image compression. This plugin is installed on the WordPress website and will “smush” the image after uploading it to the site. WPMUdev is the developer of this plugin, where they have both a free and paid version.
Imsanity is a free plugin on the WordPress repository that allows the WordPress site administrator to set a limit for the maximum size of all images uploaded. This plugin will set the limit for the full-size image as determined by the WordPress standard image sizes.
Cropping, composition, and Placement
Cropping Images
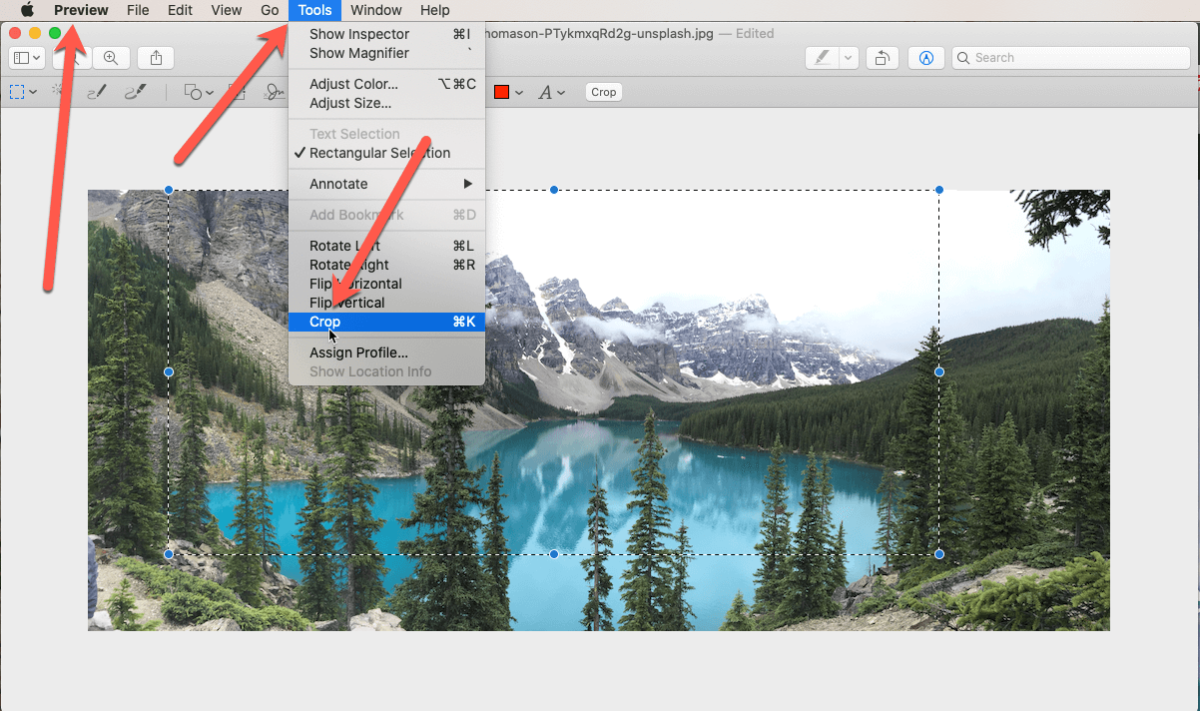
It is common to crop images in preparation for uploading images to a website. While WordPress has the ability to edit images in the back-end, it is preferable to crop images prior to uploading to your website. For Mac users, you can use Preview for cropping images. Windows users have a number of options as well as detailed here.
Responsive Images
It is important to remember that the images will scale based on the size of the screen. This is most obvious on large, full-width images. As you can see in these two examples, you only see a portion of the image in the smaller format as you would on a tablet or phone whereas you see the whole image on a computer screen. Therefore, choosing an image that can handle the cropping has definite advantages.

Alignment

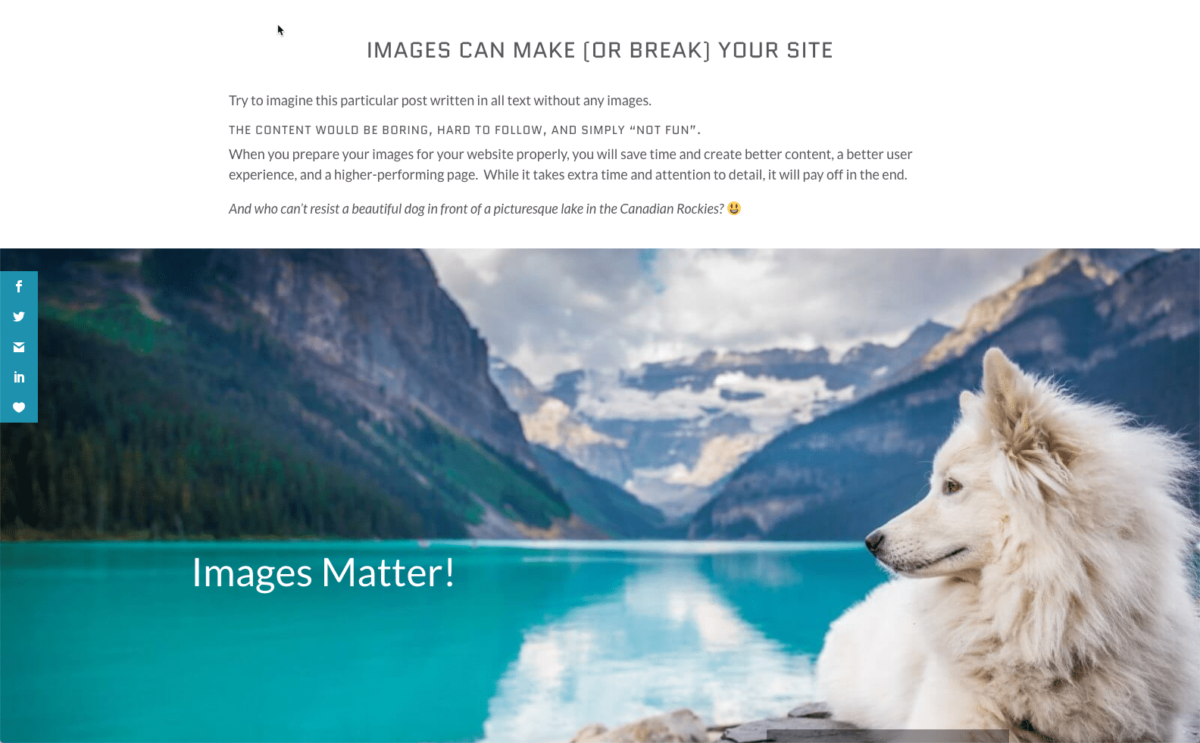
Images can also align left, right or center and text can wrap around the image. Different themes will handle this differently, so it is important to check with your particular theme. Here is an example of such an alignment. Page builders will use columns and rows to build a layout, while some themes will use the “alignright” CSS class in the html view.
Search Engine Optimization of Images
Keyword
Before you ever add your first image or word to the page, it is important to now the focus of your page and determine your “keyword”. When adding images and content to a page, it is important to know and understand your keyword. In simple terms, a keyword is a description of your content using a short phrase. This short phrase is what you think that people may search in Google to find your type of content. This is a very important topic that is worth a great deal more exploration if you are new to SEO and keywords. Yoast has a great explanation of focus keywords and how to choose them.
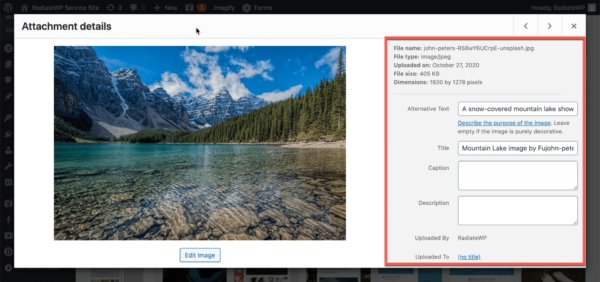
When an image is uploaded to WordPress, there are image attributes that appear in the media library. These fields have different uses and it is important not to ignore them. They provide important information to search engines as well as users who have disabilities.
Alternative Text
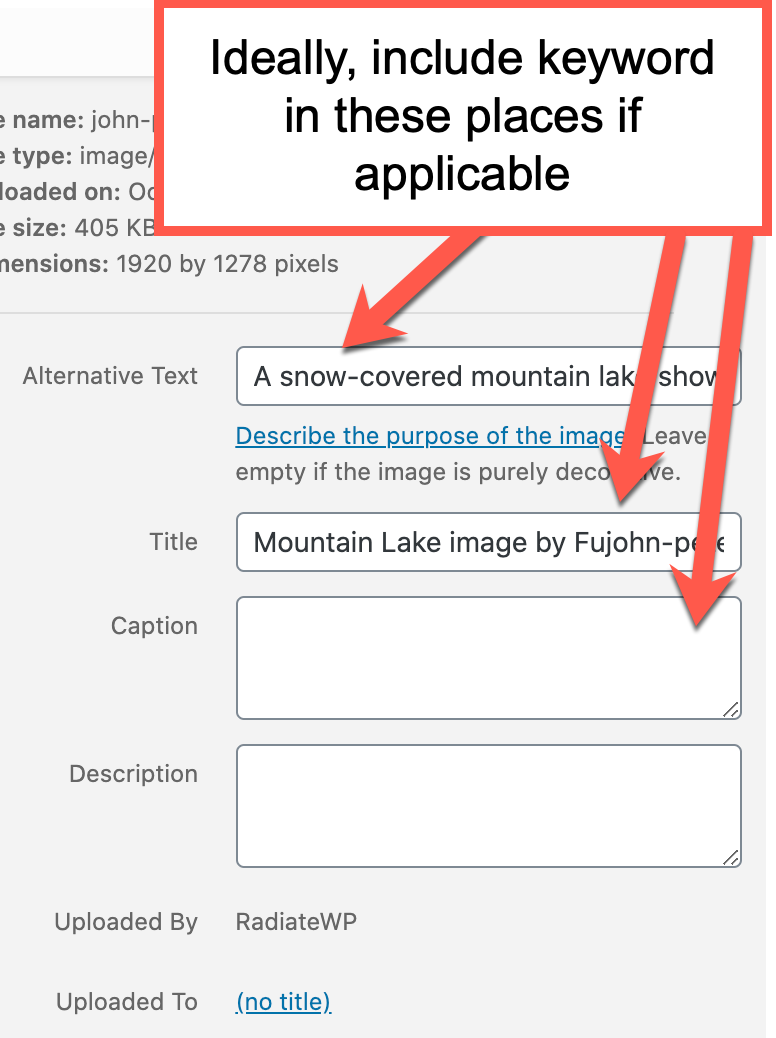
Alternative text, also known as “Alt Text”, is a fundamental attribute of your image. Not only does it tell Google what your image is about so that Google can rank your page higher, it also allows a screen reader to read the image details to someone who may have a disability and relies on a screen reader.
Title
The title should be descriptive as this will also be used in page ranking and search engine optimization. Using mountain lake is much more descriptive than lake, just as desert lake is much more descriptive than lake. If you were searching for an image of a mountain lake, you wouldn’t be interested in desert lakes. Don’t forget, including your keyword in your title is also helpful.
Caption
While this is not necessary for SEO, if it is appropriate for the content, consider using a caption for the image. It can be helpful for SEO if it helps the user understand your content. If your user better understands your content, then they stay on your page longer which will indirectly help your SEO. This is the text that is attached to the image and shows right below the image. If the image is used more than once, the caption will show below the image each time the image is used. Different themes will handle the styling of the caption differently and may affect the caption placement, the style and appearance of the caption.
Description
This is also not completely necessary for SEO UNLESS it makes the website more understandable to the user. The description is not used very often. The description is the text that shows on the images “attachment page”. What is an attachment page? This has to do with how WordPress handles images. Every image that you upload is placed on its own single page and has a specific URL to that page. It is rare that these attachment pages are a meaningful part of a website that users interact with. However, there may be some isolated instances where this is the case. The general rule of thumb that, “If it makes the site easier to use, then it is good for SEO” applies here. Yoast has a good article about attachment pages.
Tools and Resources
Canva is a website that is user-friendly allowing you to design and edit images, image composites, and even add text and effects to your design. It is an invaluable resource when preparing and working with images and designs.
Themes
- Kadence Theme
- Divi theme by Elegant Themes
- Beaver Builder
- Elementor
Image Resizer Tools
Image Crop Tools
- Aspect Ratio Calculator
- Simple Image Resizer
- Be Funky
- Online Image Resizer
- https://www.img2go.com/crop-image – online
- Adobe Photoshop Online
- Pic Resize
- I love IMG
- Be Funky
- Cloudinary
Color and Design Tools
- Chrome Tool – Color pick eye dropper – Tool to find exact color on a web page
- Canva Color Palette Generator – Helps create a color palette
- Hex Color Tool – Helps adjust color using hexadecimal code
- Mock Up World – Creates mockups with your own design
- Mock Up Catalog – More mockups with your own designs
- Place It – Easily use image placeholders when designing page content.
- Visme – A great blog post with color palette ideas.
This post is part two of a two-part series. Part one covers where to find images and how to select the perfect image.

